 The proper use and care of the soldering tip will increase soldering production and decrease solder joint failure. Properly caring for your soldering tip increases their life as well as the quality of the soldering. Here are a few tips for caring for your soldering tips.
Tinning the tip
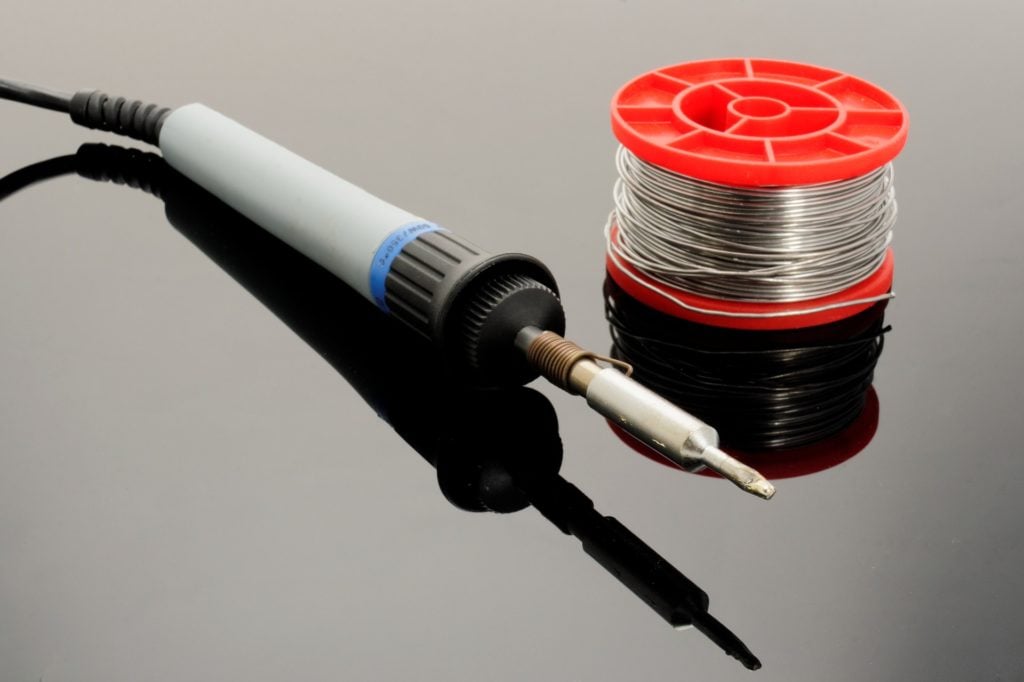
Tinning the tip means covering the tip with a layer of solder. Most modern soldering tips are composed of a copper core (copper conducts heat excellently) encased with nickel-plated iron to repel solder. However, iron tends to oxidize quickly. Tinning the tip extends the life of the tip by preventing oxidation and corrosion, but it also causes the solder wire to melt and flow more easily over the parts you are joining, making the overall soldering process go smoothly. You will want to tin your tips when you first purchase them before use, when the iron is sitting idle in the holder during use and when you finish soldering, before you pack your tips for storage.
First you will want to heat the iron up to operating temperature and wipe the tip on a damp soldering sponge to gently clean it. If the tip is very dirty you may want to dip the tip in a commercial tip cleaning paste and then wipe it clean on the damp soldering sponge. Once the tip is clean let it return to the operating temperature. Apply a small bead of solder to the copper part of the tip. Wipe away any excess solder on the damp sponge. A small amount should remain on the tip giving it a shiny appearance. The tip is now tinned and ready for use.
The lower the tin content of the solder, the more difficult it is to keep the tip from losing its protective coating of solder. This is called dewetting. To prevent dewetting, keep a roll of large diameter 63/37 solder on hand to re-tin the tip.
Cleaning the tip
Solder performs poorly on dirty, oxidized or greasy surfaces. When your tip gets dirty you will want to clean it and re-tin it before you start soldering. An oxidized tip will have a black or brown scale coating on it and need to be cleaned by either wiping them off with a damp solder sponge or using a tip cleaner.
If you are using a solder sponge make sure it is clean and dampened with distilled water. A dirty sponge collects contaminants that react at high temperatures damaging the tip. Never use an abrasive material such as sandpaper, emery cloth, scotch-brite, or a dry sponge to clean a tip. Avoid dipping your tip into flux to clean it, flux is corrosive and will cause holes and pitting in the tip. Wipe the tip off occasionally on the sponge while working. Avoid over wiping as it can cause tip failure.
Other tips
Don’t push the solder into the tip and force it to melt. This will destroy your tip. Always use a high-quality solder like for your projects because they have fewer impurities that can damage your tips. Inspect the working surface of the tip for any shape changes, pin holes or other physical defects. These are indications that the life of the tip is over, and it needs to be replaced.
Oxidation forms faster on tips with higher temperatures. Soldering over 875º F causes your tip to oxidize twice as fast as soldering at 700º F. Adjust your soldering temperature to the minimum temperature needed to have it flow smoothly.
In conclusion performing a little tip maintenance can make all the difference between your project going smoothly or running into problems.


3 thoughts on “How to Tin a Soldering Tip”
Thanks for sharing this article. Very helpful for soldering beginners and hobbyists.
I really enjoyed the article. Thank you for taking the time to write it and put it together.
It was extremely helpful. Informative yet simple, to the point.
I especially found a lot of the links that were included to be very useful. I can’t wait to read more of your stuff.
Thanks again. Keep up the good work. 🙂
So, you said that the soldering iron tip is a copper core encased in “nickel plated iron”. So is it copper, then a layer of nickel, then a layer of iron? And is iron the actual material at the very tip where you tin it and actually use it to solder things?
Why did you say (for tinning) to apply solder to the “copper part of the tip” if the copper is encased in nickel plated iron? There should be no exposed “copper part”, right?
Sorry about all the questions, but I am attempting to use electroplating to replate my soldering iron tips, and I keep seeing conflicting information about whether the outer layer of plating is actually iron or nickel.
Thank you.